Before we start, there are two things I need to mention:
- This tutorial series assumes you are familiar with HTML, CSS, and JavaScript. If you aren't, here are some tutorials I recommend:
- For all of those languages, codecademy.com provides interactive tutorials. I haven't tried the ones for HTML, CSS, and JavaScript, but I did like the one in Ruby since you get to test your code right there.
- For HTML and CSS, if you would rather read a book, I strongly recommend Head First HTML and CSS. The book has a lot of pages, but it's a very easy read, with a lot of its material in plain English. It's also the first thing I read to learn web development.
- For JavaScript, if you are looking for a book I recommend Eloquent JavaScript. There are also JavaScript tutorials all over the Internet since the language is so popular.
- Even though I have made some cool stuff in Node, I'm actually still learning Node myself. So if you think I got something wrong or I'm leaving something important or just plain cool out, please let me know so I can either update the tutorial to share your insights.
So, what exactly is Node.js? Well, if you're like me, you heard about how it's what all the cool kids use for developing their totally jammin' and radical web apps instead of beefing it by programming with frameworks that you should be far less aight with. But, my outdated slang aside, Node is a very popular tool for building web apps. And scripts. And robots. Yes, actual robots. It can be used for a lot of different things, as its fast-growing community will show you, but web development is the most popular use for Node.js, so to kick off this tutorial series, I am going to teach you how to make some tiny web servers.
First, go to nodejs.org and click install. This will download the installer. Installation for Node was pretty straightforward for me on Windows and Ubuntu, but if you have any issues with installing, Joyent, who sponsors Node, has more detailed information at https://github.com/joyent/node/wiki/installation
Once you have Node installed, create a new directory and in that directory go into your favorite text editor and write this:
var http = require('http'); //1
var hello = 'Hello world!';
http.createServer(function(req, res){ //2, 3
res.writeHead(200, { //4
'Content-Length' : hello.length,
'Content-Type' : 'text/plain'
});
res.end(hello, 'UTF-8'); //5
}).listen(34313, function(){console.log('Now listening on Port 34313!');}); //6
and save it to hello-world.js. Before I explain the code, from the command line go to the same directory as the file and run node hello-world.js and then in your browser go to http://localhost:34313 and you should see this:

Pretty cool, just nine lines of code and you got an HTTP server you can access from your computer! When you're done, go back to the command line and press ctrl-C to turn off the HTTP server. Now here's what's going on in that server:
1. In the first line, var http = require('http');, you are requiring Node's http module, which you need to do if you are using Node for web development.
2. http is a Node module with a lot of functions, and one of the functions it comes with is http.createServer, which creates the server. The function http.createServer takes in is used to process HTTP requests.
3. The parameters of the function http.createServer takes in, req and res, are an HTTP request and an HTTP response. When you go to a webpage, an HTTP request is passed in, which is processed by the server, and then an HTTP response is sent back to the browser. So this function is what processes the HTTP request and sends back the HTTP response.
4. The first line of the function writes the HTTP response's header, which the browser will use to process the response.
- 200 is the "OK" status code, which pretty much means the HTTP request worked right.
- Content-length is the length of the content being sent back in the response, which in this case is the length of the string "Hello world!". Then, the second line,
- 'Content-Type' : 'text/plain', means this response is supposed to be processed as plain text.
6. That whole function makes the server. The line .listen(34313, function(){console.log('Now listening on Port 34313!');});, makes it so that the HTTP server you created will be listening for HTTP requests on port 34313 (If you know the significance of that number, high five!).
But this server doesn't just do plain text. You can also serve HTML with the server. Replace that hello string with some HTML. Try putting this into hello-world-html.js
var http = require('http');
var helloHTML = '<html>'+
'<head>'+
'<title>First HTML page rendered in Node!</title>'+
'</head>'+
'<body>'+
'<p>Hello world!</p>'+
'</body>'+
'</html>';
http.createServer(function(req, res){
res.writeHead(200, {
'Content-Length': helloHTML.length,
'Content-Type' : 'text/plain'
});
res.end(helloHTML, 'UTF-8');
}).listen(34313, function(){console.log('Now listening on Port 34313!');});
and run it with node hello-world-html.js and you should be getting this in your browser:

Wait a minute, didn't we want an actual HTML page and not just the text of some HTML? Well, the call to res.end is giving us the data we want in the response body, but if we want the browser to treat this HTML as actual HTML, we need the response header to tell the browser that. So replace 'Content-Type' : 'text/plain' with 'Content-Type' : 'text/html' and run node hello-world-html.js again and you'll get this:

All right! Now we served a real HTML webpage! Now to make this more interesting by making a staple of 90s web development, the hit counter! Make a new file called hit-counter.js and then put this in the file:
var http = require('http');
var hits = 0; //1
http.createServer(function(req, res){
hits++; //2
console.log(hits);
var message = 'You are visitor #' + hits; //2
res.writeHead(200, {
'Content-Length' : message.length,
'Content-Type' : 'text/plain'
});
res.end(message, 'UTF-8');
}).listen(34313, function(){console.log('Now listening on Port 34313!');});
and run node hit-counter.js in the command line. Go to localhost:34313 and you should see this:

Besides the code for the actual hit counter, the code is identical to the code from the first server we made. Here are the changes:
1. When the program is started, a variable "hits" is created that keeps track of the number of browser hits the server has gotten so far.
2. When the server gets a request, the function increments the number of hits and then tells you how many hits the page has so far. Note that the hit count goes up with each hit; from when the program starts in the command line to when the server is stopped with ctrl-C, the same program in hit-counter.js is running, so the variable hits does not reset until the program stops.
So far we've worked with the response, but none of our code has touched the HTTP requests, so let's take a closer look at the request. Go into any of the programs we've made so far and in the function for handling HTTP requests, put in the code console.log(req); as a line and take a look in the terminal and you'll see something like this:
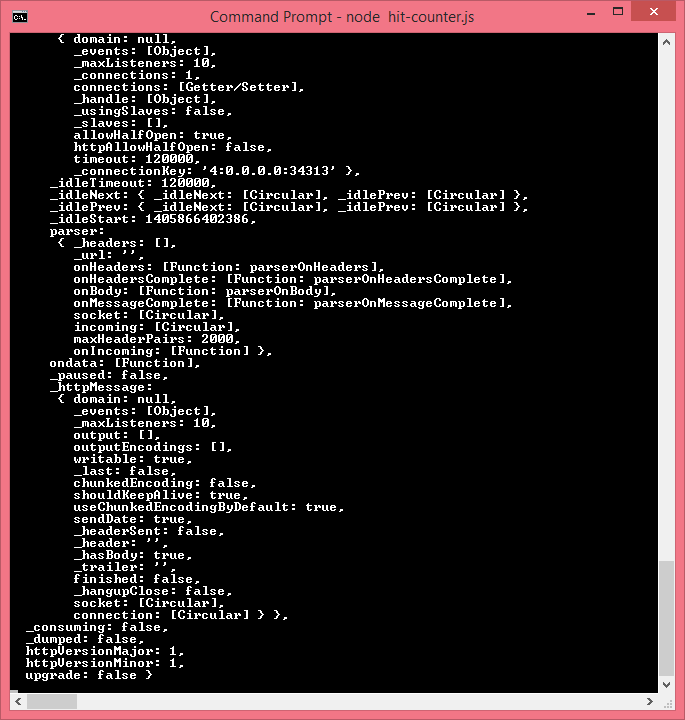
That big pile of code is actually parts of the request; req and res are both JavaScript objects. One part of the request to check out is req.url. This is basically a string of everything in the URL past localhost:34313.
So if you type in localhost:34313 in the browser, req.url is just '/'. If you type in localhost:34313/index.html, req.url is '/index.html', and if you type in localhost:34313/somewhere-else, req.url is '/somewhere-else'.
So now let's try putting the request's url in the response. Make a new file request-url.js and add in this code:
var http = require('http');
http.createServer(function(req, res){
var body = 'You requested: ' + req.url;
console.log(req.url);
res.writeHead(200, {
'Content-Length': body.length,
'Content-Type' : 'text/plain'
});
res.end(body, 'UTF-8');
}).listen(34313, function(){console.log('Now listening on Port 34313!');});
and run node request-url.js and go to localhost:34313 and you will see this:

If you request localhost:34313/about, you will get this:

The code itself is almost identical to the original server we wrote, except for this:
var body = 'You requested: ' + req.url;
As you can see, it takes the request's URL and makes it part of the response.
So now we have served plain text and HTML, we've processed part of an HTTP request, and we've made a hit counter. Now let's make something a little more slothy. First, download this image to the same folder as all of your other files from this tutorial and save it as sloth.jpg

Now make a file called sloth.js and put this code in:
var http = require('http'),
fs = require('fs');
//1
var slothHTML = '<html>'+
'<head>'+
'<title>SLOTHS</title>'+
'</head>'+
'<body>'+
'<h1>Sloths for the win</h1>'+
'<p><img src="http://localhost:34313/sloth.jpg" /></p>'+ //2
'</body>'+
'</html>';
var SLOTH = 'image/jpeg';
http.createServer(function(req, res){
if (req.url == '/sloth.jpg') { //3
fs.readFile('sloth.jpg', function(err, data){
if (err)
throw err;
res.writeHead(200, {
'Content-Length' : data.length,
'Content-Type' : SLOTH //4
});
res.end(data);
});
}
else {
res.writeHead(200, { //5
'Content-Length' : slothHTML.length,
'Content-Type' : 'text/html'
});
res.end(slothHTML, 'UTF-8');
}
}).listen(34313, function(){console.log('Now listening on Port 34313!');});
and run it with node sloth.js. Go to localhost:34313/sloth.jpg and you will get this:

and if you go to localhost:34313, you will get this:

So here's what's going on in that code:
1. For serving the sloth image, we need to load it in from its image file, we are using another built-in Node module, fs, which stands for filesystem, and is used for processing files.
2. When we load the webpage, we get this image tag <img src="http://localhost:34313/sloth.jpg" />, which is for the image of the sloth. So to get the image, another HTTP request is made to http://localhost:34313/sloth.jpg in addition to the request for the actual page's HTML.
3. When an HTTP request is made for sloth.jpg, either by requesting localhost:34313/sloth.jpg or as part of the page rendered when we request localhost:34313, we run fs.readFile to get the image. Then, when we have the image we do an HTTP response to serve the image. Don't worry about the details of fs.readFile for now. I will be talking about those in a later tutorial.
4. In order to serve the sloth image as an image, we need to set the Content-Type in the response header to 'image/jpeg', but I'm going to give them their own Content-Type, SLOTH!
5. If the page requested isn't sloth.jpg, the default is to serve the main HTML page. So the sloth's page is served and then another HTTP request is made to get the image.
So, with just Node.js and two built-in modules, we built a server capable of serving HTML and images with under a kilobyte of code. Awesome, but if we want to customize the server with things like URL parameters, routing, processing different parts of the request and response, serving responses for HTTP status codes other than 200, rendering dynamic pages, and other stuff servers do, it'd be possible to do with just Node but the code for our server would get bulky and disorganized really fast.
So in the next tutorial, we are going to look at express.js, a popular framework that does a lot of the server functionality for you, and it'll also be a great way for me to introduce you to one of my favorite parts of being a programmer, the programming community!
Nice Blog, Keep sharing your ideas and information. Thanks
ReplyDeleteAnika Digital Media
seo services
web design development
graphic design
Bermulanya Sejarah Dan Asal Usulan Permainan DominoQQ Online – Sesudah Sejarah dan Asal Usulan Permainan Domino Dikenal, karenanya kau juga akan membeberkan permainan yang tak keok familiar dari poker, ialah sejarah dan asal masukan domino
ReplyDeleteasikqq
dewaqq
sumoqq
interqq
pionpoker
bandar ceme terpercaya
hobiqq
paito warna oregon
syair hk
datahk
Good SEO providers want to build a solid foundation backlinks Linking to a website with a text link (known as anchor text) can help your SEO efforts,
ReplyDeleteObviously, the collection of a writer must be a bundle of creativity. New ideas of writing become the reason of success. It makes your work worthwhile. Everyone wants to praise your writing because they bound by creativity.
ReplyDeleteNode JS Development